文章目录
- 前言
- 新增功能介绍
- 截图功能
- 快捷键设置
- 程序设计和使用介绍
- 操作菜单栏
- 选择点击坐标点
- 选择图片
- 选择截图区域
- 快捷键设置
- 表格
- 循环次数
- 状态栏
- 使用案例
- 源代码
前言
好久没更新文章了。上一次更新是在4月16日差不多,也只是写了一个错误集,没什么太多内容。这一次,算是复习,于是基于自动点击神器的基础上,重新写了一个自动截图神器,增加了截图和快捷键设置两种功能。
自动截图神器可模拟人的重复性操作,实现自动化,提高办事效率。
新增功能介绍
截图功能
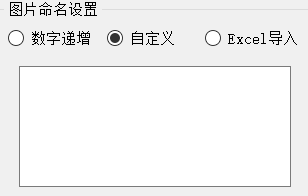
本次设计的截图可自由选择截图区域,有三种图片命名方式:
- 数字递增:第一个输入框是图片的名字,第二个输入框是递增的数字(可修改),例如第一个输入框输入 街三仔,第二个输入框的递增数字我改为1,循环次数设置为2次,则截取的第一张图片名字为 街三仔_1.png,第二张图片的名字为街三仔_2.png,以此类推。

- 自定义:自定义图片命名中设置一个多行文本框,可输入截取图片时保存的名字,若有多张截图,则用
“、”号隔开,例如,输入 街三仔、需要、一键三连😜,循环次数设置为3次,则最终保存的图片名称分别为:街三仔.png、需要.png、一键三连.png
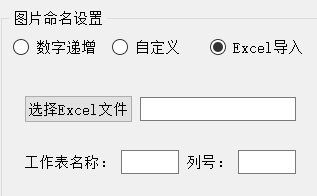
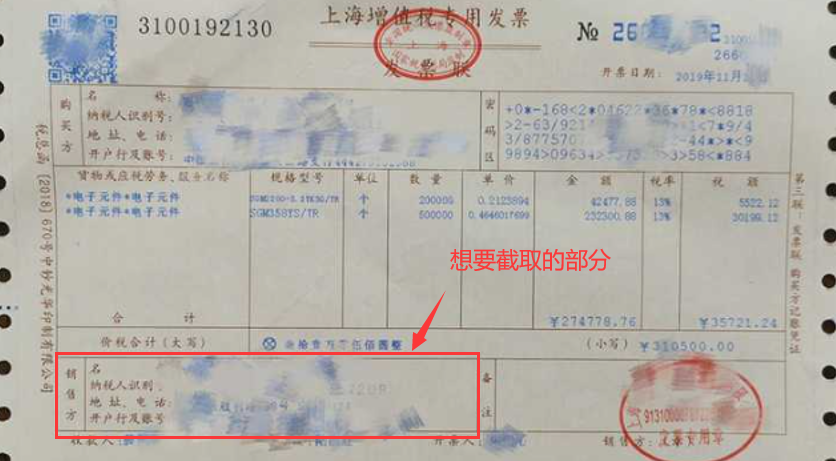
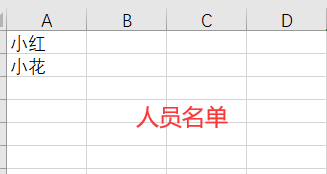
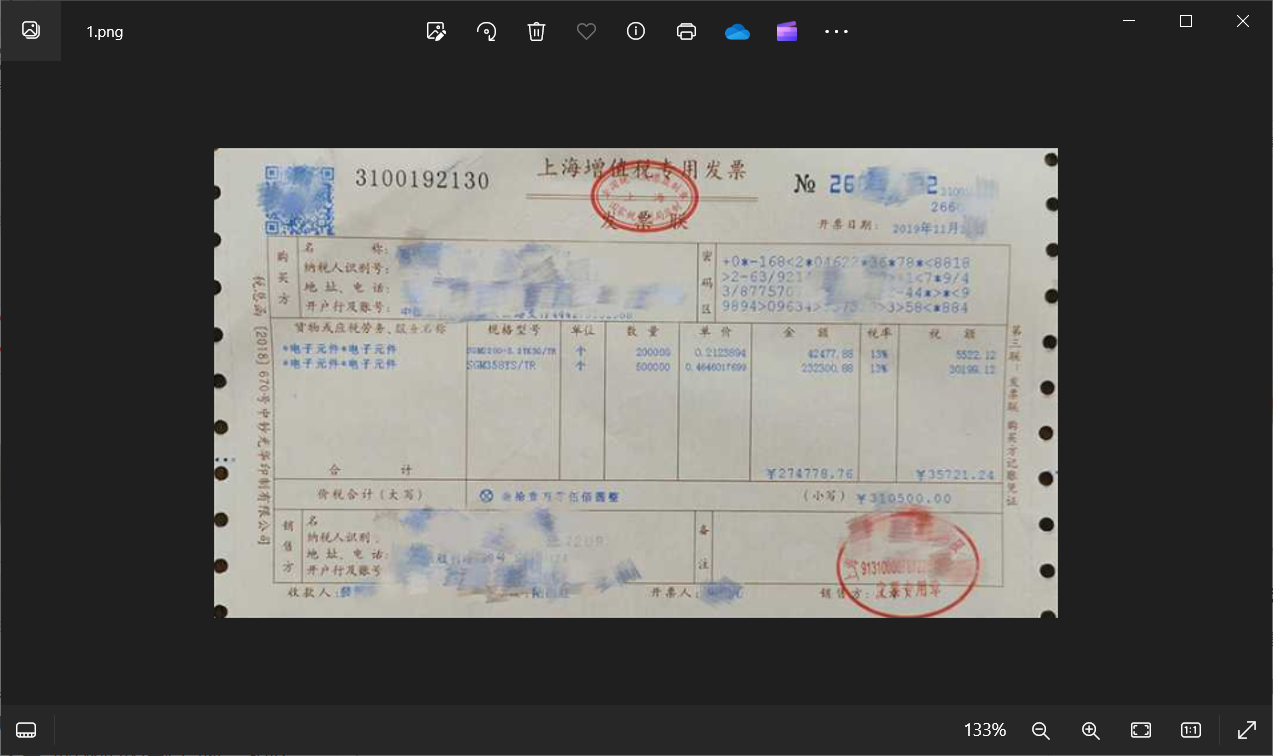
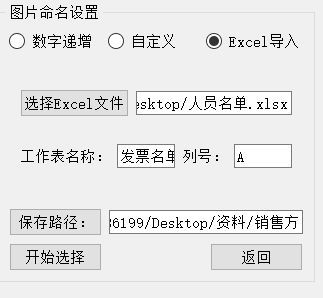
- Excel导入:设计Excel导入这一功能,主要考虑到一些人事工作的同学,例如恰好有一个Excel文件,其中某一列是人员的名字,需要截取的发票的某个部分,并以他们的名字给图片命名,但又不想挨个输入,费时间。欸!这个时候Excel导入就很有用了。
选择Excel文件(只能选择xlsx格式的Excel文件),然后输入对应的工作表名称,输入列号,列号即为字母,例如A、B、C、D……。输入完成后即可设置循环次数,开始执行即可。
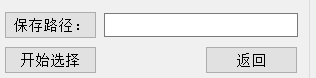
最后,选择图片保存路径,开始选择。
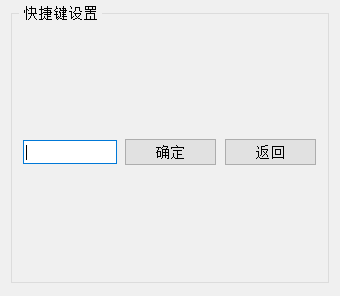
快捷键设置
如下图所示,在输入框中输入快捷键,例如,想要alt键和tab键的组合,根据按下的顺序,则在输入框中输入alt+tab,按键之间用+号连接,设置完成后点击确定即可。
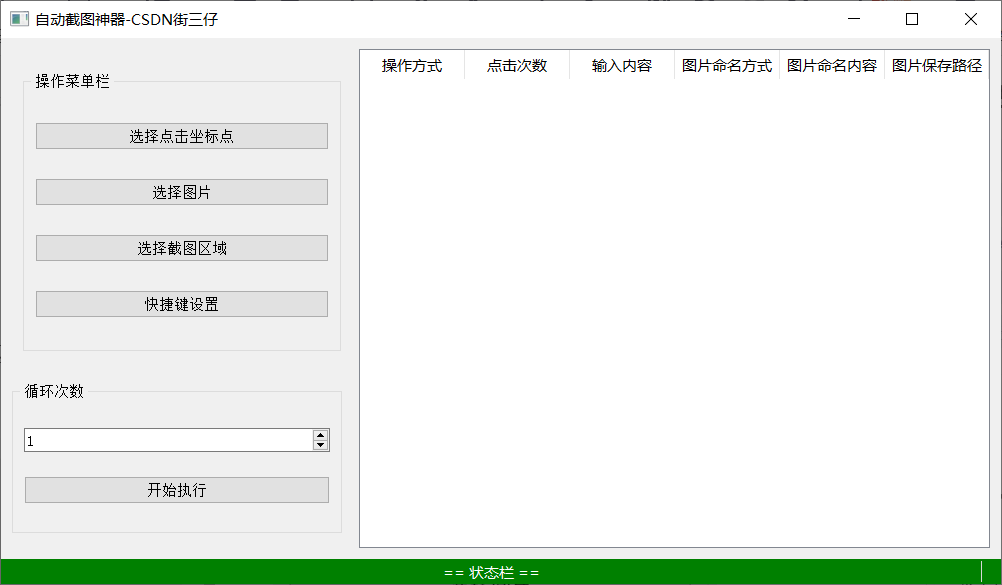
程序设计和使用介绍
本次设计的自动截图神器界面采用PyQt5模块编写;根据坐标和图片进行鼠标点击、输入内容部分采用pyautogui模块;按下快捷键部分使用pyperclip模块;监听鼠标右键点击使用pynput模块;截取图片采用PIL模块;读取Excel文件采用openpyxl模块;多线程操作采用threading模块。
自动截图神器由四大部分组成:操作菜单栏、表格、循环次数设置、状态栏。
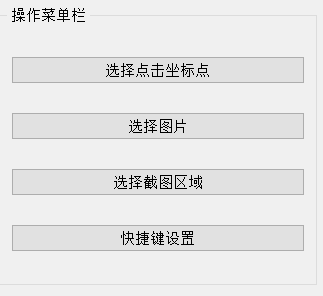
操作菜单栏
如下图所示,菜单栏中有四个按钮,以下将对这四个按钮的功能进行介绍。
选择点击坐标点
点击“选择点击坐标点”按钮,将鼠标移动到想要鼠标自动点击的位置,点击鼠标右键,即获取该点坐标,并将坐标信息显示在表格中。

操作方式里显示坐标信息,可在表格中修改点击次数,或设置输入内容,前三列可编辑,后三列不编辑。
选择图片
点击“选择图片”按钮,弹出文件选择对话框,选择想要鼠标自动点击到的图片,选择完成后会将图片路径显示在表格中。(注意:选择的图片一定是png格式,可用QQ的截图功能将想要鼠标自动点击的图片截图下来且命名最好不出现中文;路径中不能有中文。否则,会无法识别到图片并进行点击)

前三列可编辑,后三列不编辑。
选择截图区域
该部分具体看以上截图功能的介绍。点击“开始选择”按钮之后,将鼠标移动到想要截取部分的左上角,点击鼠标右键,获取左上角坐标,再将鼠标移动到想要截取部分的右下角,点击鼠标右键,获取右下角坐标,并选择图片的保存路径。(注意:想要截取不同图片可选择不同的保存路径,可灵活修改)
操作方式一列显示的是图片左上角坐标,点击次数一列显示的是右下角坐标,与“点击次数”无关,只是用来存放右下角坐标。
除了输入内容一列不能编辑,其余列可编辑。
快捷键设置
可阅读以上快捷键设置部分内容,当点击“确定”按钮后,表格中显示快捷键信息。

第一列可编辑,其余列不能编辑。
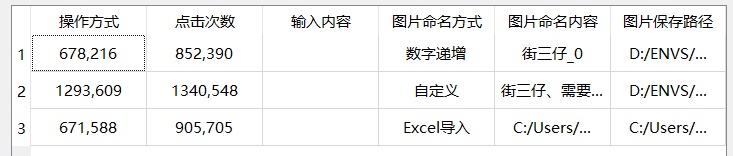
表格
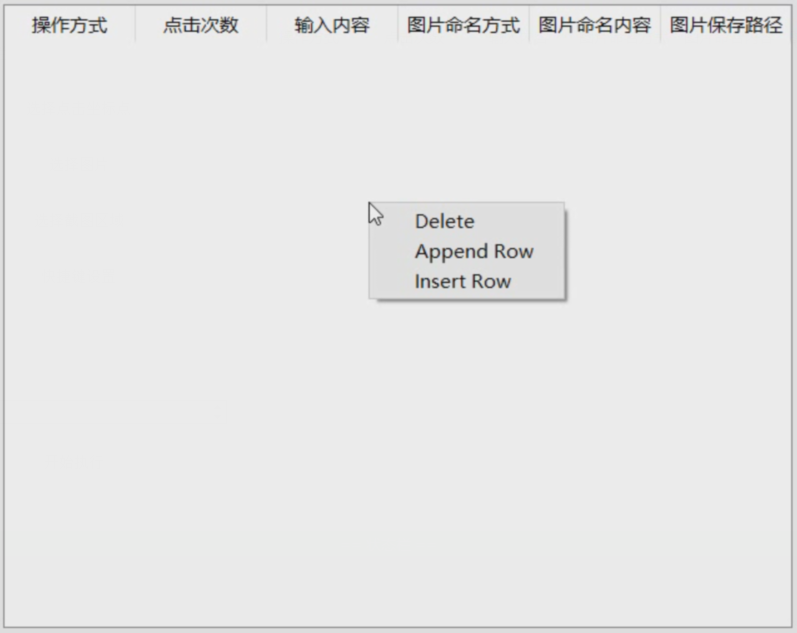
表格有六列,分别为操作方式、点击次数、输入内容、图片命名方式、图片命名内容、图片保存路径,主要用来显示中要信息。
表格中可删除、添加和插入行,在表格区域点击鼠标右键,即出现菜单栏。
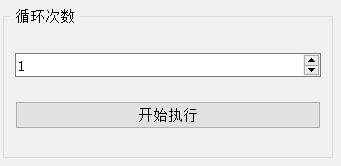
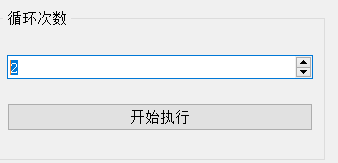
循环次数
循环次数即对表格中的操作内容进行循环,可设置循环多少次,设置好后点击“开始执行”按钮,然后松开键盘和鼠标,让其自动运行。
状态栏
状态栏主要起到用来显示用户操作的状态以及提示作用。

使用案例
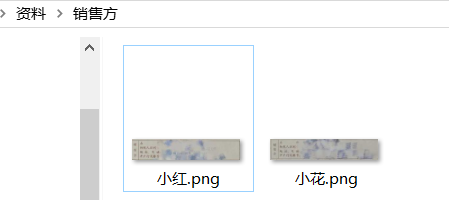
案例:张三在公司从事人事工作,现在需要收集新入职员工的发票,并将他们发票的销售方部分截图并以他们的名字命名保存。他们发来的发票,三仔都已经按照名单的顺序放在“发票”这个文件夹里,并创建了一个“销售方”文件夹,想要将截取下来的图片保存在里面。

但是数量太多😳,张三感到有点头疼,琢磨了一会,突然想到有自动截图神器这个东西,于是打开脚本。
- 张三想了一会,脑海中过了一遍人手动截图时的重复动作,想好了之后,先手动点开第一张图片。
- 然后点击“选择截图区域”区域,点击“Excel导入”,设置好后开始选择截图区域的坐标。

- 点击“选择点击坐标点”按钮,在图片下一页的按钮位置,点击鼠标右键,获取该点坐标。

- 最后将循环次数设置为2次,有多少人设置多少。
- 运行过程展示

- 截图结果
源代码
from PIL import ImageGrab
from PyQt5.QtWidgets import *
from PyQt5.QtGui import *
from PyQt5.QtCore import Qt, QTimer
import sys
from pynput.mouse import Listener
import threading
import pyautogui
import pyperclip
import openpyxl
import time


class CenteredStandardItem(QStandardItem):
    def __init__(self, text):
        super().__init__(text)

    def data(self, role):   # 根据传入的 role 参数判断是否为 Qt.TextAlignmentRole,该角色用于确定项目的对齐方式。
        if role == Qt.TextAlignmentRole:
            return Qt.AlignCenter

        return super().data(role)   # role 不是 Qt.TextAlignmentRole,则调用父类的 data 方法来处理其他角色。


class PushButton(QPushButton):
    def __init__(self, text):
        super().__init__()
        self.setText(text)

    def enterEvent(self, evt):
        shadow = QGraphicsDropShadowEffect()
        shadow.setBlurRadius(15)
        shadow.setColor(QColor(0, 0, 0))
        shadow.setOffset(0, 0)
        self.setGraphicsEffect(shadow)

    def leaveEvent(self, evt):
        self.setGraphicsEffect(None)


class Auto_shotcut(QMainWindow):
    def __init__(self):
        super().__init__()

        self.setWindowTitle('自动截图神器-CSDN街三仔')
        self.setMinimumSize(1000, 546)

        # 设置状态栏
        self.setStatusBar(QStatusBar())
        self.label_statusBar = QLabel()
        self.label_statusBar.setAlignment(Qt.AlignCenter)
        self.statusBar().addWidget(self.label_statusBar, stretch=1)
        self.statusBar_success('== 状态栏 ==')

        self.flag_shotcutNamesSetting = 1   # 1:数字递增、2:自定义、3:Excel导入
        self.setup_ui()

    def setup_ui(self):
        self.widget = QWidget()
        self.setCentralWidget(self.widget)

        self.hbox = QHBoxLayout(self.widget)    # 设置主控件的布局方法为水平布局

        # 第一列
        vbox_1 = QVBoxLayout()
        self.hbox.addLayout(vbox_1)

        # 创建主StackedWidget控件
        self.stackedWidget_main = QStackedWidget()
        self.stackedWidget_main.setFixedSize(340, 300)

        vbox_1.addWidget(self.stackedWidget_main)       # 添加StackedWidget控件到第一列中

        self.widget_operationMenu = QWidget()   # 操作菜单栏
        self.widget_shotcutNamesSetting = QWidget()     # 图片命名设置
        self.widget_shotcutKeys = QWidget()     # 快捷键设置

        # 在主StackedWidget控件中添加子控件QWidget
        self.stackedWidget_main.addWidget(self.widget_operationMenu)
        self.stackedWidget_main.addWidget(self.widget_shotcutNamesSetting)
        self.stackedWidget_main.addWidget(self.widget_shotcutKeys)

        # 为了QGroup能随着窗口变化,给widget设置布局管理器
        vbox_widget_operationMenu = QVBoxLayout(self.widget_operationMenu)
        vbox_widget_shotcutNamesSetting = QVBoxLayout(self.widget_shotcutNamesSetting)
        vbox_widget_shotcutKeys = QVBoxLayout(self.widget_shotcutKeys)

        # ---------- 主StackedWidget控件 - 操作菜单栏 ----------
        Group_operationMenu = QGroupBox('操作菜单栏')
        vbox_operationMenu = QVBoxLayout(Group_operationMenu)

        hbox_getClickAxis_1 = QHBoxLayout()
        hbox_getClickAxis_2 = QHBoxLayout()

        vbox_operationMenu.addLayout(hbox_getClickAxis_1)
        vbox_operationMenu.addLayout(hbox_getClickAxis_2)

        self.PushButton_getClickPoint = PushButton('选择点击坐标点')
        self.PushButton_getPicture = PushButton('选择图片')
        self.PushButton_getShotcut = PushButton('选择截图区域')
        self.PushButton_shotcutKeys = PushButton('快捷键设置')

        self.PushButton_getClickPoint.clicked.connect(self.run_getMouse_x_y_axis)
        self.PushButton_getPicture.clicked.connect(self.run_getPicture)
        self.PushButton_getShotcut.clicked.connect(lambda: self.stackedWidget_main.setCurrentWidget(self.widget_shotcutNamesSetting))
        self.PushButton_shotcutKeys.clicked.connect(lambda: self.stackedWidget_main.setCurrentWidget(self.widget_shotcutKeys))

        vbox_operationMenu.addWidget(self.PushButton_getClickPoint)
        vbox_operationMenu.addWidget(self.PushButton_getPicture)
        vbox_operationMenu.addWidget(self.PushButton_getShotcut)
        vbox_operationMenu.addWidget(self.PushButton_shotcutKeys)

        # 创建QTimer对象,用于判断截图时获取第一个点,即左上角的点线程是否死亡,死亡则获取下一个点,避免线程并行
        self.timer_second_right_click = QTimer()
        self.timer_second_right_click.timeout.connect(self.second_right_click)

        vbox_widget_operationMenu.addWidget(Group_operationMenu)

        # ---------- 主StackedWidget控件 - 图片命名设置 ----------
        Group_shotcutNamesSetting = QGroupBox('图片命名设置')
        vbox_Group_shotcutNamesSetting = QVBoxLayout(Group_shotcutNamesSetting)

        self.stackedWidget_shotcutNamesSetting = QStackedWidget()   # 设置QStackedWidget控件,主要用于切换显示
        self.widget_numberIncreasing = QWidget()    # 操作菜单栏
        self.widget_custom = QWidget()      # 自定义
        self.widget_tableImport = QWidget()     # Excel导入

        self.stackedWidget_shotcutNamesSetting.addWidget(self.widget_numberIncreasing)
        self.stackedWidget_shotcutNamesSetting.addWidget(self.widget_custom)
        self.stackedWidget_shotcutNamesSetting.addWidget(self.widget_tableImport)

        # 第一行
        hbox_Group_shotcutNamesSetting_1 = QHBoxLayout()
        vbox_Group_shotcutNamesSetting.addLayout(hbox_Group_shotcutNamesSetting_1)
        vbox_Group_shotcutNamesSetting.addWidget(self.stackedWidget_shotcutNamesSetting)

        self.RadioButton_numberIncreasing = QRadioButton('数字递增')
        self.RadioButton_custom = QRadioButton('自定义')
        self.RadioButton_tableImport = QRadioButton('Excel导入')

        self.RadioButton_numberIncreasing.clicked.connect(self.switch_to_numberIncreasing)
        self.RadioButton_custom.clicked.connect(self.switch_to_custom)
        self.RadioButton_tableImport.clicked.connect(self.switch_to_tableImport)

        hbox_Group_shotcutNamesSetting_1.addWidget(self.RadioButton_numberIncreasing)
        hbox_Group_shotcutNamesSetting_1.addWidget(self.RadioButton_custom)
        hbox_Group_shotcutNamesSetting_1.addWidget(self.RadioButton_tableImport)

        # 第二行
        # 数字递增
        hbox_widget_numberIncreasing = QHBoxLayout(self.widget_numberIncreasing)
        self.lineEdit_numberIncreasing_text = QLineEdit()
        self.lineEdit_numberIncreasing_number = QLineEdit()
        self.lineEdit_numberIncreasing_number.setText('0')
        self.lineEdit_numberIncreasing_number.setFixedSize(30, 24)

        hbox_widget_numberIncreasing.addWidget(self.lineEdit_numberIncreasing_text)
        hbox_widget_numberIncreasing.addWidget(QLabel('_'))
        hbox_widget_numberIncreasing.addWidget(self.lineEdit_numberIncreasing_number)

        # 自定义
        hbox_widget_custom = QHBoxLayout(self.widget_custom)
        self.textEdit_custom = QTextEdit()
        self.textEdit_custom.setToolTip('文件名用“、”隔开,例如:A、B')
        hbox_widget_custom.addWidget(self.textEdit_custom)

        # Excel导入
        vbox_widget_tableImport = QVBoxLayout(self.widget_tableImport)
        hbox_widget_tableImport_1 = QHBoxLayout()
        hbox_widget_tableImport_2 = QHBoxLayout()
        vbox_widget_tableImport.addLayout(hbox_widget_tableImport_1)
        vbox_widget_tableImport.addLayout(hbox_widget_tableImport_2)

        PushButton_select_excel = PushButton('选择Excel文件')
        PushButton_select_excel.clicked.connect(self.select_excel)

        self.lineEdit_select_excel = QLineEdit()
        self.lineEdit_sheet = QLineEdit()
        self.lineEdit_column = QLineEdit()

        hbox_widget_tableImport_1.addWidget(PushButton_select_excel)
        hbox_widget_tableImport_1.addWidget(self.lineEdit_select_excel)
        hbox_widget_tableImport_2.addWidget(QLabel('工作表名称:'))
        hbox_widget_tableImport_2.addWidget(self.lineEdit_sheet)
        hbox_widget_tableImport_2.addWidget(QLabel('列号:'))
        hbox_widget_tableImport_2.addWidget(self.lineEdit_column)

        self.RadioButton_numberIncreasing.setChecked(True)
        self.stackedWidget_shotcutNamesSetting.setCurrentWidget(self.widget_numberIncreasing)

        # 第三行
        # 选择截图保存路径
        PushButton_savePath = PushButton('保存路径:')
        self.lineEdit_savePath = QLineEdit()
        PushButton_savePath.clicked.connect(self.select_savePath)

        hbox_Group_shotcutNamesSetting_2 = QHBoxLayout()
        vbox_Group_shotcutNamesSetting.addLayout(hbox_Group_shotcutNamesSetting_2)

        hbox_Group_shotcutNamesSetting_2.addWidget(PushButton_savePath)
        hbox_Group_shotcutNamesSetting_2.addWidget(self.lineEdit_savePath)

        # 第四行
        self.PushButton_run_getShotcut = PushButton('开始选择')
        PushButton_return = PushButton('返回')

        self.PushButton_run_getShotcut.clicked.connect(self.run_getShotcut)
        PushButton_return.clicked.connect(self.switch_to_widget_operationMenu)

        hbox_Group_shotcutNamesSetting_3 = QHBoxLayout()
        vbox_Group_shotcutNamesSetting.addLayout(hbox_Group_shotcutNamesSetting_3)

        hbox_Group_shotcutNamesSetting_3.addWidget(self.PushButton_run_getShotcut)
        hbox_Group_shotcutNamesSetting_3.addStretch(1)
        hbox_Group_shotcutNamesSetting_3.addWidget(PushButton_return)

        # vbox_1.addWidget(Group_shotcutNamesSetting
        vbox_widget_shotcutNamesSetting.addWidget(Group_shotcutNamesSetting)

        # ---------- 主StackedWidget控件 - 快捷键设置 ----------
        Group_shotcutKeys = QGroupBox('快捷键设置')
        hbox_Group_shotcutKeys = QHBoxLayout(Group_shotcutKeys)

        self.lineEdit_shotcutKeys = QLineEdit()
        self.lineEdit_shotcutKeys.setToolTip('快捷键中用“+”连接键,例如:alt+tab')      # 提示标签

        PushButton_shotcutKeys_checked = PushButton('确定')
        PushButton_shotcutKeys_return = PushButton('返回')    # 返回到“操作菜单栏”按钮
        PushButton_shotcutKeys_checked.clicked.connect(self.PushButton_shotcutKeys_checked_Clicked)
        PushButton_shotcutKeys_return.clicked.connect(self.switch_to_widget_operationMenu)

        hbox_Group_shotcutKeys.addWidget(self.lineEdit_shotcutKeys)
        hbox_Group_shotcutKeys.addWidget(PushButton_shotcutKeys_checked)
        hbox_Group_shotcutKeys.addWidget(PushButton_shotcutKeys_return)

        vbox_widget_shotcutKeys.addWidget(Group_shotcutKeys)

        # 设置主StackedWidget控件当前的窗口显示为“操作菜单栏”
        self.stackedWidget_main.setCurrentWidget(self.widget_operationMenu)

        # ---------- 终止设置 ----------
        Group_terminationSettings = QGroupBox('循环次数')
        Group_terminationSettings.setFixedSize(330, 150)
        vbox_Group_terminationSettings = QVBoxLayout(Group_terminationSettings)
        hbox_Group_terminationSettings_1 = QHBoxLayout()
        vbox_Group_terminationSettings.addLayout(hbox_Group_terminationSettings_1)

        # 循环次数
        self.spinBox_runtimes = QSpinBox()
        self.spinBox_runtimes.setMinimum(1)     # 设置最小值
        self.spinBox_runtimes.setMaximum(2147483647)   # 设置最大值为无限大
        self.spinBox_runtimes.setValue(0)

        # 执行按钮
        self.PushButton_start = PushButton('开始执行')
        self.PushButton_start.clicked.connect(self.run_start)

        hbox_Group_terminationSettings_1.addWidget(self.spinBox_runtimes)

        vbox_Group_terminationSettings.addWidget(self.PushButton_start)

        vbox_1.addWidget(Group_terminationSettings)

        # 设置QTimer,监控程序运行结束后,即线程死掉,“开始执行”按钮可以使用
        self.timer_start = QTimer()
        self.timer_start.timeout.connect(self.check_timer_start)

        self.setTableView()

    # 状态栏设置
    def statusBar_success(self, text):
        self.label_statusBar.setText(text)
        self.statusBar().setStyleSheet('background-color: green; color: white')

    def statusBar_wrong(self, text):
        self.label_statusBar.setText(text)
        self.statusBar().setStyleSheet('background-color: red; color: white')

    # ================      表格设置      ================
    def setTableView(self):
        self.model = QStandardItemModel(0, 5)
        self.model.setHorizontalHeaderLabels(['操作方式', '点击次数', '输入内容', '图片命名方式', '图片命名内容', '图片保存路径'])

        # 创建 QTabelView
        self.table_view = QTableView()
        self.table_view.setModel(self.model)
        self.table_view.setSelectionBehavior(QTableView.SelectRows)     # 指定了选择行为为选择整行。当点击表格中的某一行时,整行会被选中。
        self.table_view.setContextMenuPolicy(Qt.CustomContextMenu)      # 指定了自定义上下文菜单策略,表明用户在表格视图上右击时,会触发自定义的上下文菜单事件。
        self.table_view.customContextMenuRequested.connect(self.shwo_context_menu)

        # 设置表头自适应宽度
        self.table_view.horizontalHeader().setSectionResizeMode(QHeaderView.Stretch)
        self.hbox.addWidget(self.table_view)

    def shwo_context_menu(self, position):
        # 右键菜单
        menu = QMenu()

        delete_row = QAction('Delete')
        append_row = QAction('Append Row')
        insert_row = QAction('Insert Row')

        delete_row.triggered.connect(self.delete_row_clicked)
        append_row.triggered.connect(self.append_row_clicked)
        insert_row.triggered.connect(self.insert_row_clicked)

        menu.addActions([delete_row, append_row, insert_row])

        # 显示菜单
        menu.exec_(self.table_view.viewport().mapToGlobal(position))

    # 删除行
    def delete_row_clicked(self):
        select_rows = sorted(set(index.row() for index in self.table_view.selectedIndexes()), reverse=True)      # 例:选择第三行,self.table_view.selectedIndexes()=[3, 3, 3],reverse=True为倒序,先从后面删除行才能正常删除
        for row in select_rows:
            self.model.removeRow(row)
    # 添加行
    def append_row_clicked(self):
        # 创建空的数据项
        self.model.appendRow([CenteredStandardItem(''), CenteredStandardItem(''), CenteredStandardItem(''), CenteredStandardItem(''), CenteredStandardItem(''), CenteredStandardItem('')])

    # 插入行
    def insert_row_clicked(self):
        selected_row = self.table_view.currentIndex().row()     # 获取当前选中的行
        self.model.insertRow(selected_row + 1, [CenteredStandardItem(''), CenteredStandardItem(''), CenteredStandardItem(''), CenteredStandardItem(''), CenteredStandardItem(''), CenteredStandardItem('')])    # 插入空行到选中行的下方

    # ================      主QStackedWidget控件 - 操作菜单栏:QPushButton按钮clicked连接槽设置      ================
    # “选择点击坐标点”的操作
    def run_getMouse_x_y_axis(self):
        self.PushButton_getClickPoint.setEnabled(False)
        self.statusBar_success('== 选择……(点击鼠标右键,选择点击坐标点) ==')
        threading.Thread(target=self.getMouse_x_y_axis).start()

    def getMouse_x_y_axis(self):
        def on_click(x, y, button, pressed):
            if button == button.right:
                self.model.appendRow([CenteredStandardItem(f'{x},{y}'), CenteredStandardItem(str(1)), CenteredStandardItem('')])
                self.PushButton_getClickPoint.setEnabled(True)
                self.statusBar_success('== 点击坐标点选择完成 ==')
                listener.stop()     # 停止监听器的执行

        with Listener(on_click=on_click) as listener:
            listener.join()

    # “选择截图区域”的操作
    def switch_to_widget_shotcutNamesSetting(self):
        self.stackedWidget_main.setCurrentWidget(self.widget_shotcutNamesSetting)

    # 选择图片
    def run_getPicture(self):
        picture_path, _ = QFileDialog.getOpenFileName(self, "选择文件", "", "Photo (*.png)")
        if picture_path:
            self.model.appendRow([CenteredStandardItem(picture_path), CenteredStandardItem('1'), CenteredStandardItem('')])
            self.statusBar_success('== 图片选择完成 ==')

    # ================      子widget_shotcutNamesSetting控件:QRadioButton、QPushButton按钮clicked连接槽设置      ================
    def switch_to_numberIncreasing(self):
        self.stackedWidget_shotcutNamesSetting.setCurrentWidget(self.widget_numberIncreasing)
        self.flag_shotcutNamesSetting = 1

    def switch_to_custom(self):
        self.stackedWidget_shotcutNamesSetting.setCurrentWidget(self.widget_custom)
        self.flag_shotcutNamesSetting = 2

    def switch_to_tableImport(self):
        self.stackedWidget_shotcutNamesSetting.setCurrentWidget(self.widget_tableImport)
        self.flag_shotcutNamesSetting = 3

    # 判断图片命名设置内容是否完整
    def is_shotcutNamesSetting_info_complete(self):
        if self.flag_shotcutNamesSetting == 1:
            li = [self.lineEdit_numberIncreasing_text, self.lineEdit_numberIncreasing_number]
            for i in li:
                if i.text() == '' or i.text() == None:
                    return 1
        elif self.flag_shotcutNamesSetting == 2:
            if self.textEdit_custom.toPlainText() == '':
                return 1
        elif self.flag_shotcutNamesSetting == 3:
            li = [self.lineEdit_sheet, self.lineEdit_column, self.lineEdit_savePath]
            for i in li:
                if i.text() == '' or i.text() == None:
                    return 1
        if self.lineEdit_savePath.text() == '':
            return 1
        else:
            return 0

    # 执行“选择截图区域”
    def run_getShotcut(self):
        if self.is_shotcutNamesSetting_info_complete():
            self.statusBar_wrong('== 图片命名设置:信息填写不完整 ==')
            return
        else:
            self.showMinimized()    # 最小化窗口
            self.statusBar_success('== 选择…… ==')

        self.temp_list = []
        self.t = threading.Thread(target=self.getShotcut)
        self.t.start()
        self.timer_second_right_click.start(1000)

    def getShotcut(self):
        def on_click(x, y, button, pressed):
            if button == button.right:
                self.temp_list.append(x)
                self.temp_list.append(y)
                self.flag_getShotcut = False
                listener.stop()     # 停止监听器的执行

        with Listener(on_click=on_click) as listener:
            listener.join()

    # 第二次点击鼠标右键
    def second_right_click(self):
        if not self.t.is_alive():
            self.getShotcut()
            # 判断是何种图片命名方式,并将相关的信息写在表格中
            if self.flag_shotcutNamesSetting == 1:  # 数字递增
                self.model.appendRow([CenteredStandardItem(f'{self.temp_list[0]},{self.temp_list[1]}'), CenteredStandardItem(f'{self.temp_list[2]},{self.temp_list[3]}'), CenteredStandardItem(''), CenteredStandardItem(f'数字递增'), CenteredStandardItem(f'{self.lineEdit_numberIncreasing_text.text()}_{self.lineEdit_numberIncreasing_number.text()}'), CenteredStandardItem(self.lineEdit_savePath.text())])

            if self.flag_shotcutNamesSetting == 2:  # 自定义
                self.model.appendRow([CenteredStandardItem(f'{self.temp_list[0]},{self.temp_list[1]}'), CenteredStandardItem(f'{self.temp_list[2]},{self.temp_list[3]}'), CenteredStandardItem(''), CenteredStandardItem(f'自定义'), CenteredStandardItem(f'{self.textEdit_custom.toPlainText()}'), CenteredStandardItem(self.lineEdit_savePath.text())])

            if self.flag_shotcutNamesSetting == 3:  # Excel导入
                self.model.appendRow([CenteredStandardItem(f'{self.temp_list[0]},{self.temp_list[1]}'), CenteredStandardItem(f'{self.temp_list[2]},{self.temp_list[3]}'), CenteredStandardItem(''), CenteredStandardItem(f'Excel导入'), CenteredStandardItem(f'{self.lineEdit_select_excel.text()},{self.lineEdit_sheet.text()},{self.lineEdit_column.text()}'), CenteredStandardItem(self.lineEdit_savePath.text())])

            self.statusBar_success('== 截图区域选择完成 ==')
            self.switch_to_widget_operationMenu()   # 切换到操作菜单栏
            self.showNormal()   # 恢复窗口显示
            self.timer_second_right_click.stop()    # 停止QTimer

    # 切换到“操作菜单栏”中
    def switch_to_widget_operationMenu(self):
        self.stackedWidget_main.setCurrentWidget(self.widget_operationMenu)
        self.statusBar_success('== 状态栏 ==')

    # 选择Excel文件
    def select_excel(self):
        excel_path, _ = QFileDialog.getOpenFileName(self, "选择Excel文件", "", "Excel (*.xlsx)")
        if excel_path:
            self.lineEdit_select_excel.setText(excel_path)

    # 选择保存路径
    def select_savePath(self):
        savePath = QFileDialog.getExistingDirectory(self, "图片保存路径", "")
        if savePath:
            self.lineEdit_savePath.setText(savePath)

    # ================      子widget_shotcutKeys:QPushButton按钮clicked连接槽设置      ================
    def PushButton_shotcutKeys_checked_Clicked(self):
        self.model.appendRow([CenteredStandardItem(self.lineEdit_shotcutKeys.text())])
        self.stackedWidget_main.setCurrentWidget(self.widget_operationMenu)
        self.statusBar_success('== 快捷键设置完成 ==')

    def run_start(self):
        self.showMinimized()    # 最小化窗口
        self.PushButton_start.setEnabled(False)
        self.t_start = threading.Thread(target=self.start)
        self.timer_start.start(1000)
        self.t_start.start()

    # 开始执行
    def start(self):
        # 获取表格中每一行的信息
        table_info = []
        rows = self.model.rowCount()
        columns = self.model.columnCount()

        if rows == 0:
            return
        self.statusBar_success('== 运行中…… ==')

        for row in range(rows):
            temp = []
            for col in range(columns):
                try:
                    item = self.model.item(row, col)
                    temp.append(item.text())
                except:
                    temp.append(None)
            table_info.append(temp)
        time.sleep(1)   # 睡眠1秒,为了等窗口最小化后执行程序
        FunctionDesign().run(int(self.spinBox_runtimes.text()), table_info)

    # 判断线程是否死亡
    def check_timer_start(self):
        if not self.t_start.is_alive():
            self.PushButton_start.setEnabled(True)
            self.showNormal()   # 恢复窗口显示
            self.statusBar_success('== 运行结束 ==')
            self.timer_start.stop()


class FunctionDesign:
    def __init__(self):
        self.n1 = 0  # 数字递增
        self.n2 = 0  # 自定义
        self.n3 = 0  # Excel导入

    # 坐标点击
    def coordinateClick(self, x, y, clickTimes):
        for i in range(clickTimes):
            pyautogui.leftClick(x, y)

    # 图片点击
    def pitureClick(self, piturePath, clickTimes):
        r = None
        while r is None:
            r = pyautogui.locateOnScreen(piturePath)
        x, y = pyautogui.center(r)
        for i in range(clickTimes):
            pyautogui.leftClick(x, y)

    # 快捷键
    def shotcutKeys(self, shotcutKeys):
        pyautogui.hotkey(shotcutKeys)

    # 输入内容
    def writeContent(self, content):
        pyperclip.copy(content)
        pyautogui.hotkey('ctrl', 'v')

    # 将表格的每一行传入,判断执行对应功能
    def Execute(self, li):
        # 如果是截图
        if ',' in li[0] and ',' in li[1]:
            path = None
            if li[3] == '数字递增':
                names = li[4].split('_')
                path = li[5] + '/' + names[0] + '_' + str(int(names[1]) + self.n1) + '.png'
                self.n1 += 1

            elif li[3] == '自定义':
                temp_li = li[4].split('、')
                if self.n2 < len(temp_li):
                    path = li[5] + '/' + temp_li[self.n2] + '.png'
                    self.n2 += 1

            elif li[3] == 'Excel导入':
                temp_li = li[4].split(',')
                f = openpyxl.load_workbook(temp_li[0])
                sheet = f[temp_li[1]]
                names = [i.value for i in sheet[temp_li[2]]]    # 获取列值
                if self.n3 < len(temp_li):
                    path = li[5] + '/' + names[self.n3] + '.png'
                    self.n3 += 1
            point1 = list(map(int, li[0].split(',')))
            point2 = list(map(int, li[1].split(',')))
            area = (point1[0], point1[1], point2[0], point2[1])
            shot = ImageGrab.grab(area)
            shot.save(path)
            return

        # 如果是图片
        if 'png' in li[0]:
            self.pitureClick(li[0], int(li[1]))
        elif (',' in li[0] and ',' not in li[1]):   # 坐标
            x, y = list(map(int, li[0].split(',')))
            self.coordinateClick(x, y, int(li[1]))
        else:   # 否则为快捷键
            self.shotcutKeys(li[0].split('+'))
            return

        # 输入内容
        if li[2] != '' or li[2] != None:
            self.writeContent(li[2])

    def run(self, runtimes, table_info):
        self.n1 = 0  # 清零
        self.n2 = 0  # 清零
        self.n3 = 0  # 清零
        for i in range(runtimes):
            for info in table_info:
                self.Execute(info)


if __name__ == '__main__':
    app = QApplication(sys.argv)
    auto_shotcut = Auto_shotcut()
    auto_shotcut.show()
    sys.exit(app.exec_())